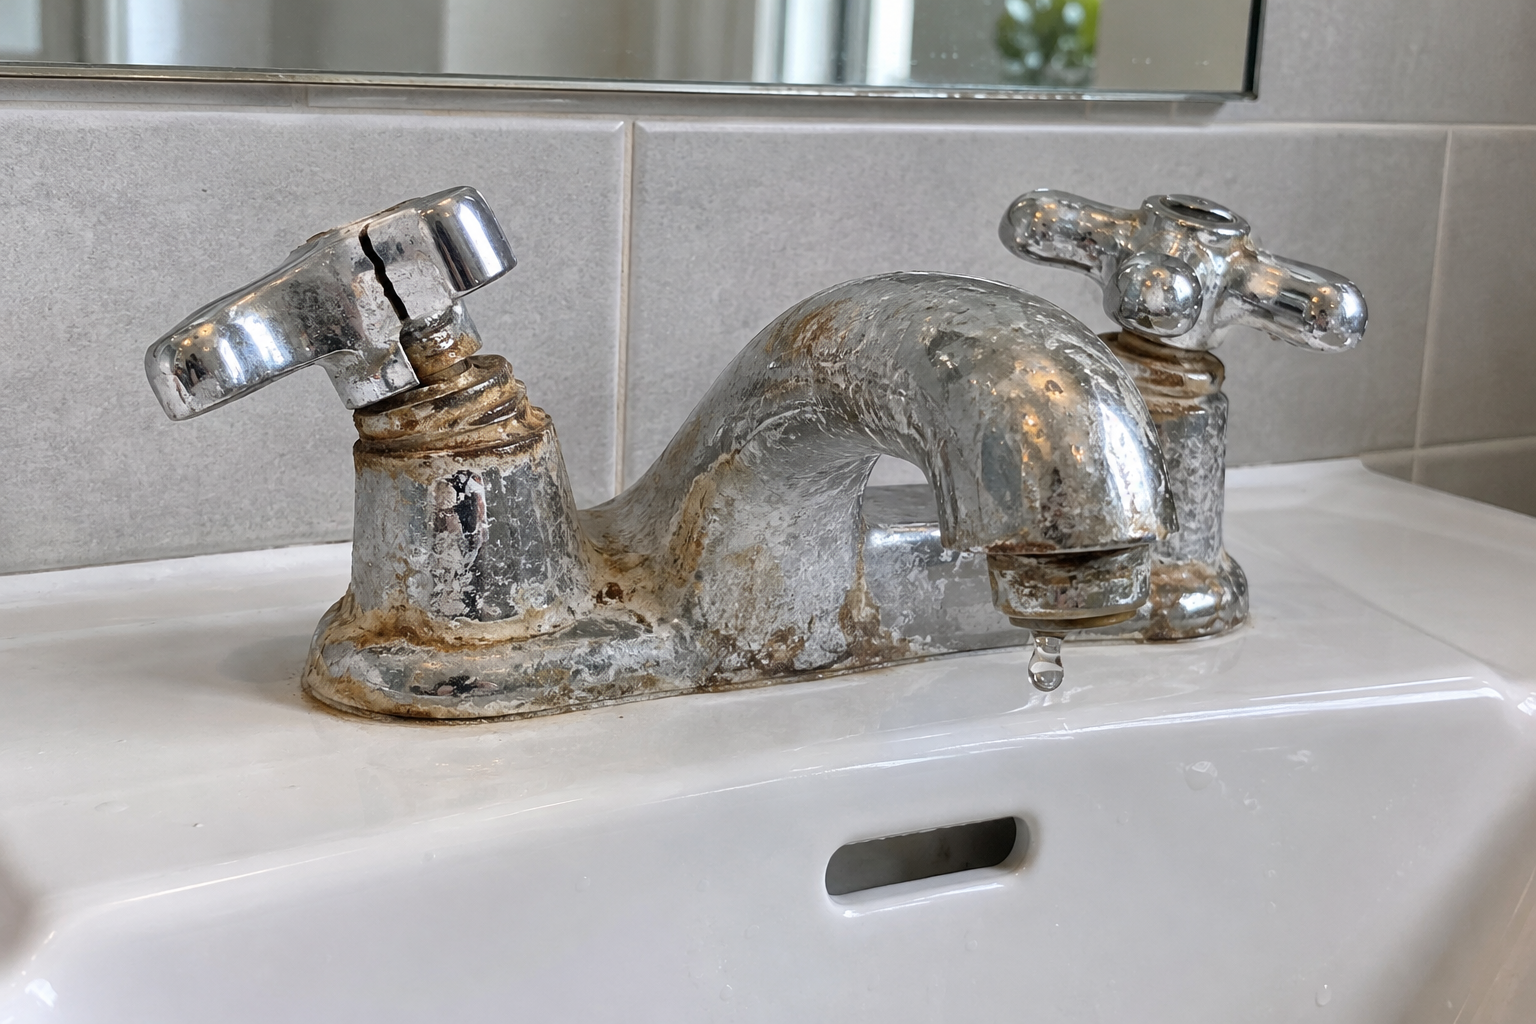
 Before
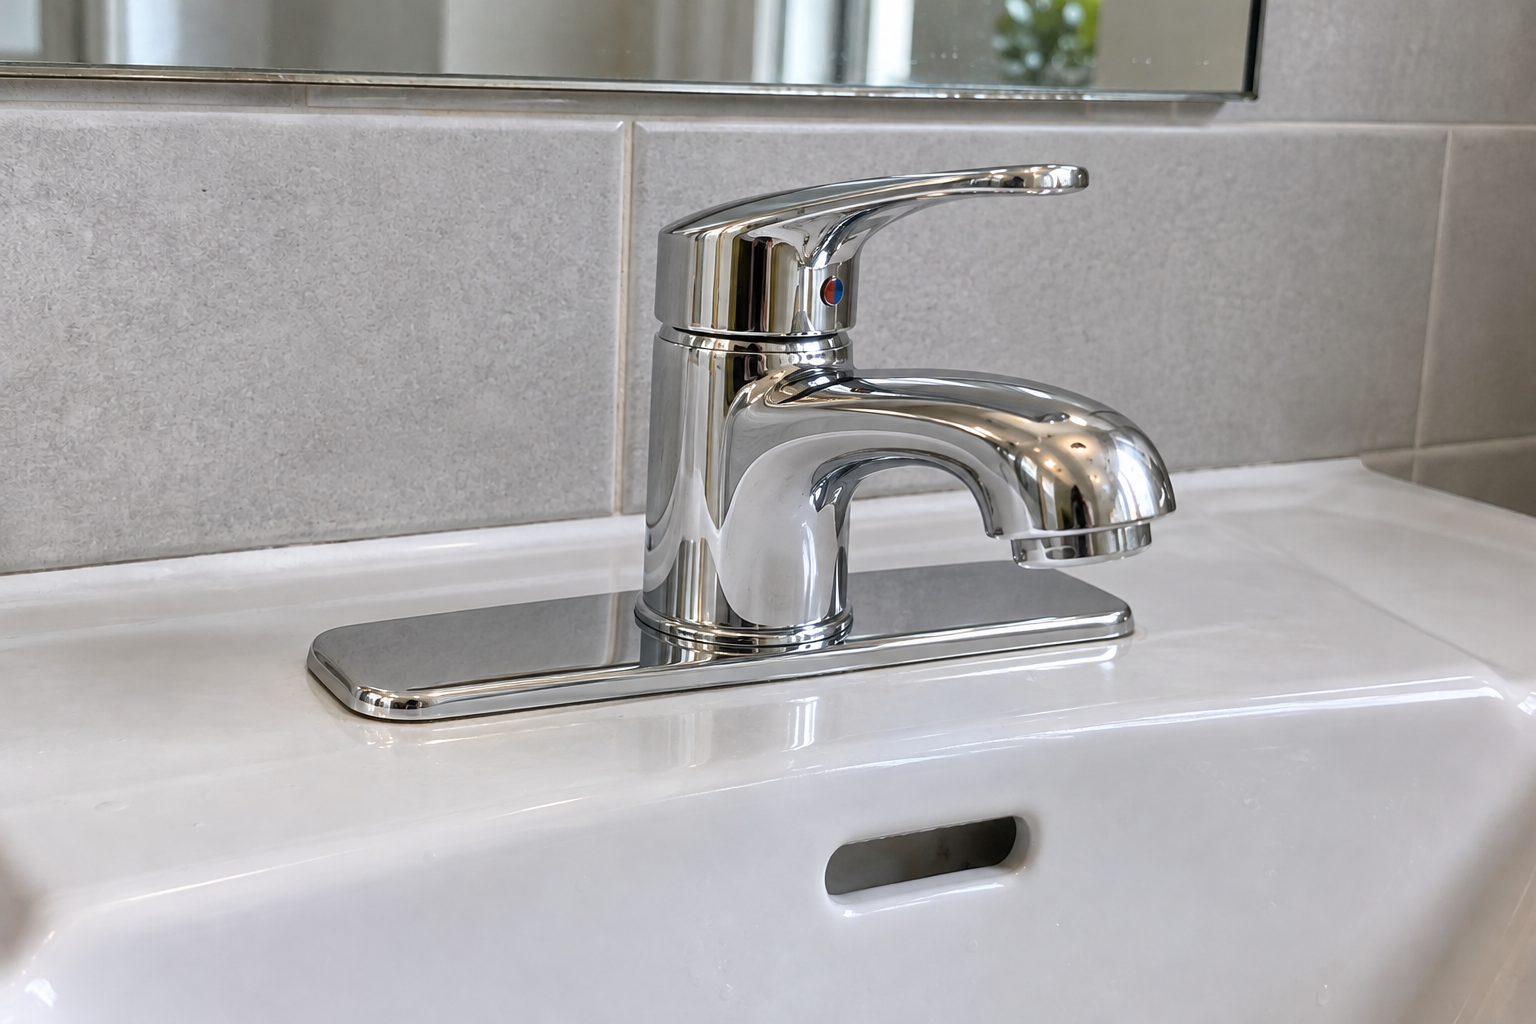 After
AfterStart with the question the photos need to answer
A client usually wants to know what condition you found and what you changed. Choose views that answer those questions rather than simply collecting attractive finished photos.
For a tap replacement, the useful comparison is the same basin before and after the new fitting. For a wall repair, include a room landmark as well as the repaired surface. A close-up with no location makes it harder to connect the detail to the work order.
Capture the starting condition before work begins
Take a wide view that identifies the room or asset, then a closer view of the relevant damage or worn part. Keep a landmark in the image so you can match the position later.
Record the actual work date separately from any date you see on a gallery import. Importing a photo today does not mean it was taken today. If you did not capture the earlier condition, label what you have accurately rather than staging a substitute.
- Identify the room, item or work section.
- Take one overview and one useful detail.
- Keep the original photograph.
- Avoid unrelated faces, paperwork or other personal details in frame.
Match the angle, distance and lighting
Return to approximately the same position for the finished view. Keep the camera height, framing and visible landmarks similar. Use comparable lighting where possible so shadows or glare do not exaggerate the change.
You do not need pixel-perfect alignment. You need two views that a client can recognize as the same place. If the item moved or the original viewpoint is no longer available, add a brief note explaining the difference.
Record useful details before they are covered
Some details disappear when a cover goes back on or the work is enclosed. Photograph a relevant connection or component while it is visible and safely accessible during the normal work.
A photograph of a component is not itself a test result. If you performed a check, describe the check and your actual observation in the caption. Include a reading only if you recorded it; do not infer hidden condition or performance from an attractive finished view.
Use arrows and circles with restraint
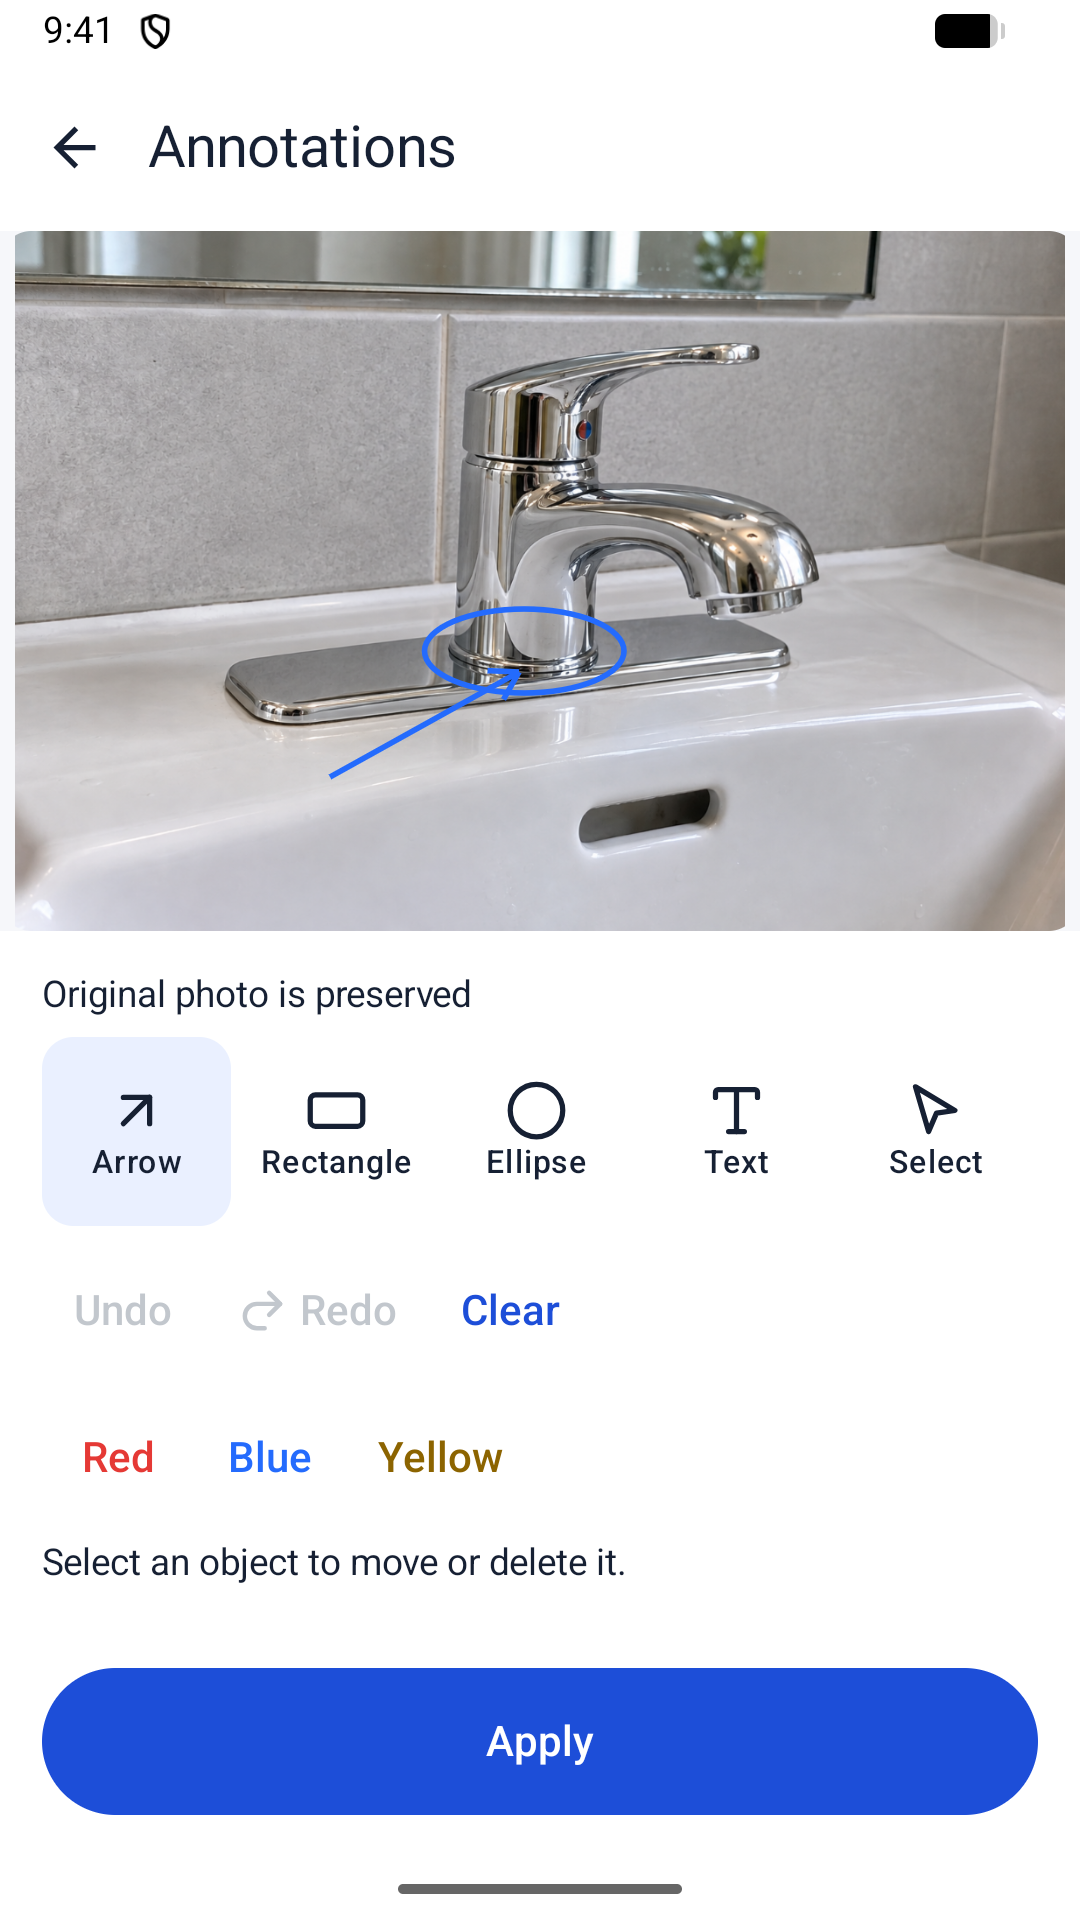
Add one arrow to the replaced part or one circle around the relevant area. Leave the feature itself visible. A short caption can explain what the mark means.
Preserve the original image, and distinguish the annotation from the underlying photograph. Reportago supports editable arrows, circles, rectangles and text, along with zoom for close inspection. The image example on this page uses a fictional tap-replacement demonstration, not a real client job.
Copy this on-site photo checklist
Use the checklist while you are at the job, then adapt it to the actual work. Photograph only what is accessible within your normal safe workflow; do not dismantle completed work solely to get a better picture.
BEFORE / AFTER REPAIR PHOTO CHECKLIST

[ ] Identify the job, area or asset.
[ ] Record the actual work date.
[ ] Take a before overview with a recognizable landmark.
[ ] Capture the relevant starting-condition detail.
[ ] Photograph useful work details while safely visible.
[ ] Take the after view from a comparable position.
[ ] Add a close-up only if it explains something new.
[ ] Caption the visible change and any actual observation.
[ ] Label remaining work or follow-up clearly.
[ ] Keep original photos and preview the final PDF.
[ ] Save the exported version; record delivery separately.
[ ] Keep an editable backup of the job record.
Turn the photo set into a handover
Keep each pair in the same work section. Place before, after and any relevant detail in a sequence the reader can follow. Add a caption naming the task and the visible result. If several visits were needed, separate them using the actual dates instead of mixing them into a single apparent before/after event.
The report should distinguish completed work from an unresolved issue. A new tap beside an unchanged stain can both be shown accurately. State what was replaced and what remains, without implying every surrounding surface was restored.
Use the completed-work photo report template to assemble the job details and sections. Preview the PDF at a size where captions and marked details can be read.
Related guide: Photo Report Template for Completed Work: A Practical GuideView sample PDFCreate the comparison in Reportago
Reportago brings camera series, gallery photos, captions and before/after pairs into a local Android report. You can organize multiple areas into work sections, highlight details and generate a PDF with a layout suited to the photos.
Generated PDF history lets you return to a previous export. Keep delivery confirmation separate. The app is currently awaiting its Android release; the sample PDF is available to inspect today.
Frequently asked questions
What if I forgot the before photo?
Use the finished photos and describe the work accurately. An older image can add context if you label its actual date and origin. Do not present a staged image as the original condition.
Do before-and-after photos prove a repair passed every check?
They show visible condition from the photographed viewpoints. Record actual checks and observations separately; photos alone do not establish hidden performance or certified compliance.
Should I send all the camera-roll photos?
Select images that explain the job. Group them by area and remove unnecessary duplicates before creating the report.